

Aseel / Asil Hatching Eggs Incubation Instructions
For the best possible results from our Aseel / Asil hatching eggs, careful incubation is essential. These are valuable breeding eggs, so we strongly recommend using a reliable, digitally controlled incubator with accurate temperature and humidity readings. Every incubator is different, and correct, stable conditions are far more important than frequent adjustments.
1. Before incubation
Allow shipped eggs to rest at room temperature for approximately 12–24 hours, pointy end down, before placing them into the incubator. This allows the eggs to settle after transportation.
2. Incubator temperature
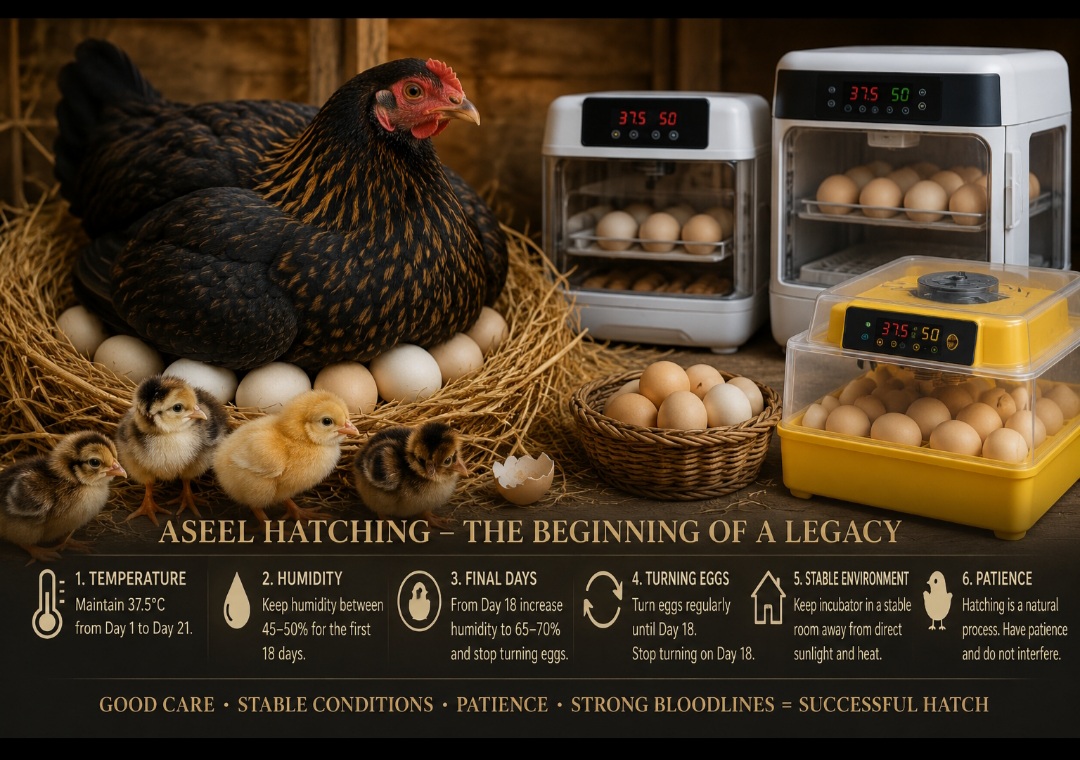
Set a forced-air incubator to approximately 37.5°C and maintain a stable temperature throughout incubation. Avoid unnecessary temperature fluctuations.
3. Humidity during incubation
For the first 18 days, aim for approximately 45–50% relative humidity. The exact figure can vary depending on your incubator, ventilation and local conditions, so monitoring the eggs and following your incubator manufacturer’s guidance is important.
4. Humidity during the final days
From approximately day 18, stop turning the eggs and increase humidity to around 65–70% for hatching. This higher humidity helps prevent the membranes from becoming too dry while the chicks hatch.
5. Do not allow large humidity fluctuations
A good incubator should have reliable humidity control. Avoid repeatedly opening the incubator or making large adjustments. Sudden changes, particularly during the final stage, can make hatching more difficult.
6. Incubator location is extremely important
Place the incubator in a stable indoor room away from direct sunlight, windows, radiators, draughts and other sources of heat. During very hot summer weather, an air-conditioned room can be beneficial if the room temperature is kept stable. Never allow the room to become excessively hot, because the incubator may struggle to maintain the correct temperature.
7. Turning the eggs
Turn the eggs regularly from the beginning of incubation until approximately day 18. If your incubator has automatic turning, use the manufacturer’s recommended setting. Stop turning at day 18 so the chick can position itself correctly for hatching.
8. Do not keep opening the incubator
Once the eggs reach the final hatching stage, avoid opening the incubator unnecessarily. Opening it can cause humidity to fall rapidly and can dry the membranes around a chick that is trying to hatch.
9. Around day 21
Chicken eggs normally hatch at around 21 days, although some chicks may hatch slightly earlier or later. Do not be concerned if one egg takes a little longer.
10. When a chick makes a small hole
Once a chick has pipped the shell, it is important to allow it time to hatch naturally. A chick may rest for many hours between making the first hole and completing the hatch. This is normal and gives the chick time to absorb the remaining yolk and blood vessels.
11. Do not rush to help a chick out
We do not recommend removing the shell or membrane simply because a chick appears to be taking a long time. Helping too early can cause bleeding, injury or even death. In many cases, what looks like a chick needing help is actually a normal part of the hatching process.
12. Leave newly hatched chicks inside the incubator
After hatching, leave the chick inside the incubator until it is completely dry, fluffy and active, normally around 12–24 hours. Removing it too soon can unnecessarily disturb the temperature and humidity of the remaining eggs.
13. After hatching
Once the chick is dry and strong, move it to a clean, warm brooder with suitable chick feed and fresh drinking water. Maintain appropriate brooder temperature and gradually reduce the heat as the chicks grow and feather.
14. Most importantly — patience
Hatching Aseel is an exciting process, but every egg and every chick can develop at its own pace. Stable temperature, appropriate humidity, good ventilation, clean equipment and patience are the keys to giving your eggs the best opportunity to hatch successfully.
A Final Note From Us
Our Aseel / Asil hatching eggs are produced from carefully selected breeding birds, but no seller can guarantee a hatch rate. Hatch results can be affected by transportation, egg handling, storage, incubator accuracy, humidity, temperature, turning, ventilation and many other factors after the eggs leave us. We therefore recommend following these instructions carefully and using a good-quality, accurately calibrated incubator.
We wish you every success with your hatch — and hope you enjoy the unforgettable moment when your first Aseel chick breaks through the shell.
Important Note:
Eggs or Live Chicks – Your ChoiceWhen placing your order, you can choose either live chicks or eggs — the choice is entirely yours.
1. Each and every £30 you can have 1 live chick (Collection Only from the MK area).
2. £60 – 6 EGGS for you to hatch yourself.
3. £90 – 12 eggs for you to hatch yourselfIf you choose to hatch the eggs yourself.
you accept full responsibility for the hatching results. More chicks, fewer chicks, or no chicks hatching at all are all possible, and hatching results are not guaranteed. Eggs will not be replaced free of charge and no refund will be given if some or all eggs fail to hatch.